3D modelling Week two
- Kieron Rutter
- Jul 14, 2020
- 4 min read

Electric boogaloo
This time I have now continued development of the Junkrat gun I was working on in my previous post, as well as finished (almost) an entire model from the game TF2 (Team fortress 2) named the Huo-long heater, this weapon I have modelled however does not have as many references as the previous, so I had to explore the weapon within the game itself and other forms of media.
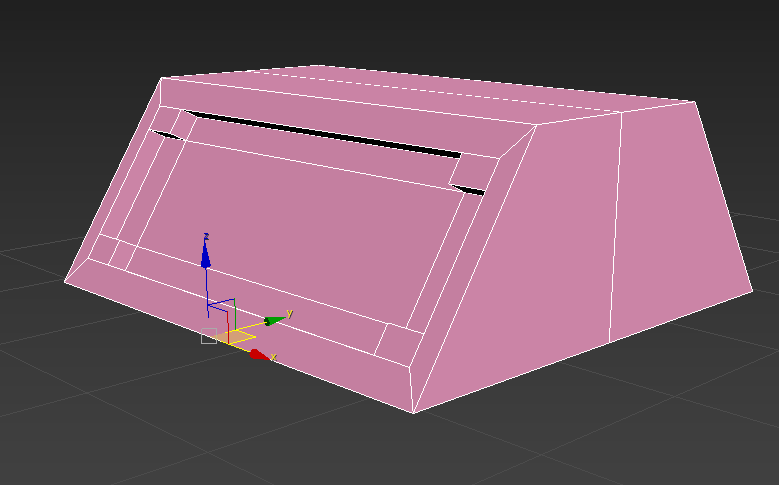
Junkrat Progress
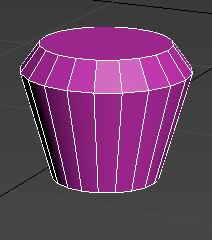
To start with I will showcase the current progress made on the 1st model:


As you can see, I haven't really progressed much in the modelling process of this 1st model, as my attention has been more focused on the second, I have however used different technique to making complex shapes which will be seen used heavily on a part in my next model, this technique uses the plane object, and then proceed to shape it into the part I am making by using edit poly modifiers, and once I am satisfied with the shape I use a shell modifier, giving the plane a 3D shape (adding sides and depth), and then proceeded to add another edit poly to chamfer the new sides from the shell modifier, I then used a symmetry modifier to mirror it onto the other side of the model
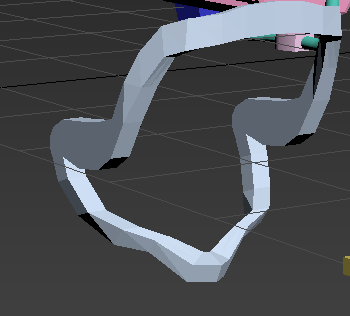
The other object was simply a box, with edges chamfered and is slightly bent, I will soon be adding a boolean to cut into the shape but there is still more progress (and objects) needed to be added before the boolean is used, otherwise this could ruin the object entirely by being too complex.
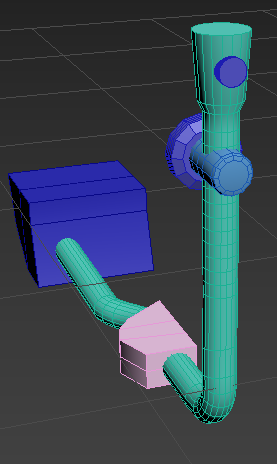
Huo-Long Heater
Over the weekend I have been working on my second model, the Huo-Long Heater from TF2 primarily holstered by the heavy weapons guy.
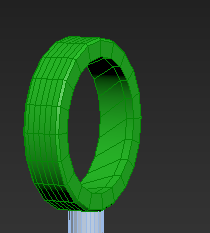
To begin with I created a simple a simple cube, with 1 Height segment (a extra line that wraps around the shape) making it into a hexagon, after that to save time I deleted 3/4 of the hexagon and a large wide cross in the middle of the diagonal side, giving it more depth (this was all done using edit poly) and then adding two symmetry to make it into a hexagon again, and then chamfered the edges, making it smoother, however I was not able to chamfer them all as the object got too complex and some faces crossed each other, making it black and buggy.
After that, I then added some more hexagons adding another edit poly modifier, and insetting the front and back of the ammo cartridge, making a smaller hexagon and then chamfered again.
When the ammo cartridge was done I needed to model the pipe that wraps around it and it used to exhaust flames around the gun, to do this I simply started off with a cylinder and slowly bent the cylinder using loads of height segments and edit poly, making it smoother, and bevelling the top area of the pipe to create the 'funnel', while making simple geometric shapes that reinforced them to the cartridge, and added another two cylinders to be on par to the original.
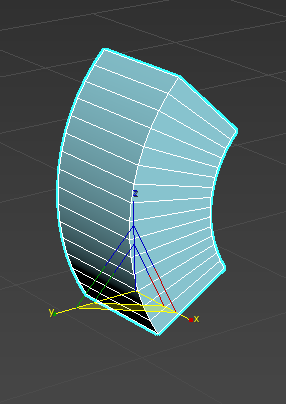
I then made simple edit poly squares, with a slight indent and symmetrical, to make the ends bend slightly upwards, and clone the same object without the bends on the ends of the rectangle, while instead adding a bend modifier to make the bend more smoother, as well as making the height of the rectangle slightly larger.
After that I then made the third and final side piece on top of the barrel, this was done by first creating a cube, insetting the middle to give it a border and some depth, then adding more vertical lines in entire middle faces so I could make the curve fit into the square without overlapping, and the curve simple used a bend modifier from a rectangle and a symmetry modifier.
Next I made a simple connector using a rectangle and bend technique (as mentioned before), however also using a edit poly to extrude a selection on the end of the connector, making it larger.
After all of that, it was basically a series of edit poly symmetry and bend techniques to create the main gun, however I did need to use things such as the spline tool:
This allows me to create a 2D line, and render it to be 3D, allowing me to efficiently create things such as wires connecting around the weapon.
I also used the proboolean tool as seen in my previous post, allowing me to attach two objects together, this was used on the massive blue handle near the connector.
One more technique I used which has been seen before is the smooth selection tool, which allows me to smoothly select and manipulate a group of polygons, without seeming forced.


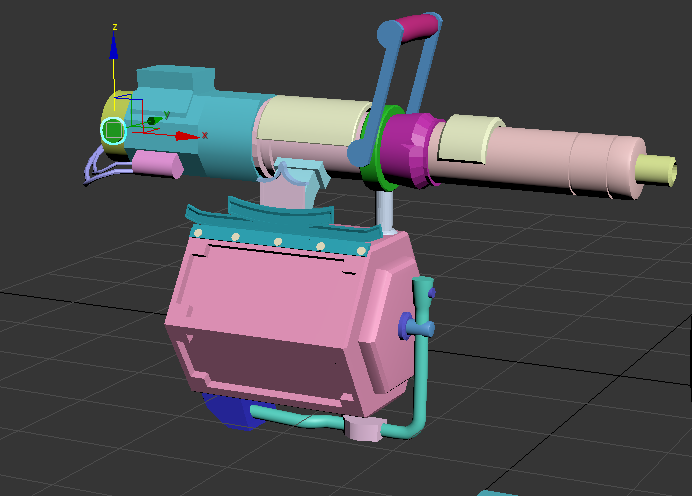

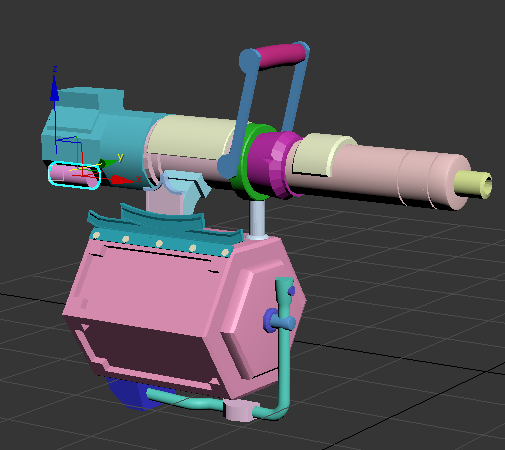


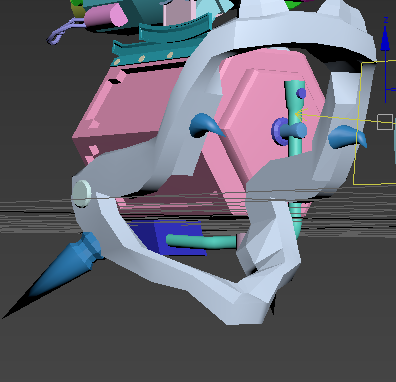

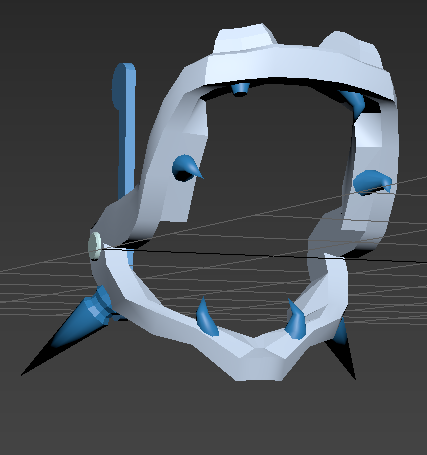

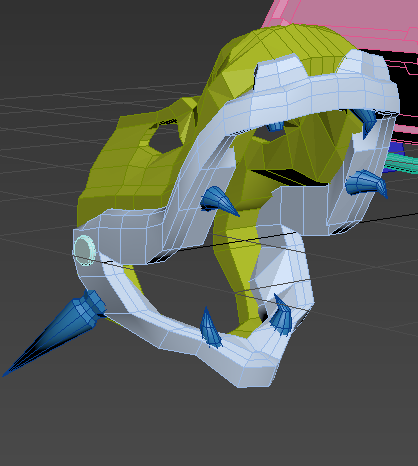


Finally I created the most difficult part of the model, the dragons head... This was extremely difficult as I did this all within 3dsmax rather than creating this externally in Mudbox, like I done with a another project named the Beholster Diorama:


To begin with I created a simple jawline, by using a rectangle and extruding it, giving it different angles, and to save time creating a symmetry modifier.

After that I gave the jaw some more depth and detail making it look more solid, I did this again by extruding some edges, allowing me to make a nose and depth overall.
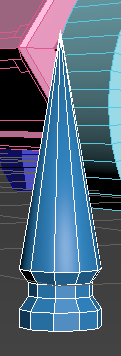

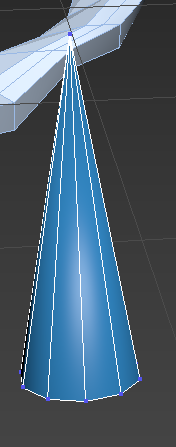
I then began work on the teeth, for this I used a new technique seen in the edit poly area, selecting all the vertices and using the collapse function, making them all collapse into one becoming a cone.
Proceeding from that I duplicate this to create some decorative horns from the side of the dragon, by simply using the edit poly, insetting extruding and bevelling the spike.
I then began placing the spikes and horns, and finally created the base of the dragons head, this was done through many complex extrudes, but mainly with the help of the edit poly bridge function, allowing me to fill holes within the shape as I deleted faces making the head look a lot smoother and less rigid.

And that's about it for this week so far i'll be sure to update on any progress made throughout this week and perhaps make a second part.


Comments